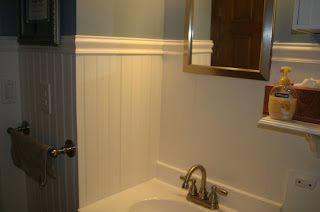
The final steps included removing the remaining tile. To do so, I had to disconnect the sink and remove the tank on the toilet. This, of course, made it into a full day project.
Since the bathroom is so small, we have to come up with some creative ways for storage. The house has 1 bathroom and it is 8'x5' (not including the shower).


I added some shelving above the toilet. But, in order to still have access to all of the internal parts of the toilet, I added a piano hinge to the shelf. I then added some front supports to keep it level.


I notched the beadboard for the sink so that it would sit flush against the wall. I had the beadboard come flush against the top of the sink so that I could pull the base of the cabinet away from the wall an inch or so and have the sink be supported by the cabinet.

Overall my wife and I are VERY happy with the outcome. The beadboard is so much nicer than the tile that was there.
Wondering how the beadboard is doing so far? I want to install beadboard in my bathroom, but am worried about moisture warping the wood. Your bathroom project is so lovely!
ReplyDeleteI wondered about it...that's why I went with the vinyl beadboard. No problems at all. The other choice was to use MDF beadboard or real wood. I didn't like those because of the chance of mold.
ReplyDeleteHow did you join the beadboard with the the shower tile? I am in the process of installing beadboard in my bathroom, but I need to butt it up against the shower tile. Did you use any trim pieces?
ReplyDeleteWe don't have tile in our shower. We have Bath Fitters, which is a 1-piece shower surround. It has a finish piece on it. I had to scribe my cut for the beadboard and filled in with caulking.
ReplyDeleteSince it is 2 different materials, I wasn't worried about it looking odd. You can get a trim piece for your tile (similar to what they use on floors). It is usually metal.