Wednesday, December 23, 2009

Downstairs Bathroom Progress

So...since we had to remove 16" of the wall from floor to ceiling, this left some patching that I needed to finish. It has been staring at me ever since. You can see what I mean below. I am glad that we were able to save the pieces using the Dremel because it made it less work for me overall.


I had to cut some grooves into the the current plaster so I could actually tape before mudding. If it just mudded on top of those seams, they probably would have cracked within a week and caused me undue stress. My walls are veneer plaster, so what that consists of is:

1st Layer - Blueboard
2nd Layer - Plaster
3rd Layer - Skimcoat

This equals to about 1" thick walls compared to normal drywall at 1/2".

I used my scraper to chip away at the skimcoat layer. Of course some of the plaster came with it, so I filled that in and then taped the seams.


You are probably wondering why it is pink. Well, I purchased a small container of touch-up joint compound when I was repairing dings in our other walls. It goes on pink and dries white. I used what I had left just on taping the seams. Then I purchased a 5-gallon bucket of Joint Compound as I will be needing it for the upstairs bedroom anyway.

Here is the 2nd coat (after taping). Since the wall was so uneven, I figured i would just skim coat the whole thing to make it smooth and even. There is a real art to mudding. If you can do a good job mudding, there is less sanding to do (of course you still have to sand though).


And of course the final coat. This is before sanding. I am not the quickest when it comes to mudding, but it looks pretty smooth to me.


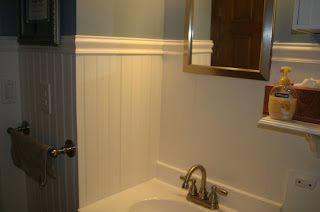
Primed and Painted and now back to the way it was. Just need to install the top molding and cabinet and it will be like nothing ever happened.


Here is a picture of where the toilet is going to be with the plywood reinstalled. We are going to tile the floor since someone at work graciously donated his leftover Slate Tile. Just need to pick up a couple of more. So, we need to install the cement board on top of what we have there now. It is going to look GREAT.

I am going to cut the 12x12 tiles into 6x12 pieces and lay them along the 3' side so that it makes the room feel longer. The camera was giving me problems, which is why you are not seeing any pictures of the sink.

Wednesday, December 16, 2009

Plumbing Progress

3Steps Forward...2 steps back.

2 weekends ago I helped Anthony install his new 60" Monster TV. I think I am finally over my jealously until he reminds me that his TV is 44% larger than my 50" TV. Things never go quite as well as you want. We hung the TV on Saturday, but were unable to run all of our wiring so we finished on Monday. It is a thing of BEAUTY!!


Since the plumber gave me a good deal on roughing in the bathroom, he needed a 2nd set of hands for running the plumbing from the basement to the 2nd floor. That was accomplished this past weekend. The plan was to get the 2nd floor toilet and sink drain connected to the main drain and vent. Since the new bathroom is on the 2nd floor, we had to tear up the downstairs bathroom. We cut a 16" chase from floor to ceiling. This required removing the toilet and sink in the bathroom. Since this is our only bathroom, Tanya left for the day with the children to visit my brother.

Since we have 1" thick Veneer Plaster walls, I didn't want to just break the plaster with the hammer and then try to figure out how to repair it later. I used the Dremel Multimax to cut through the plaster. Then we were able to break it off in sections that we could re-use. Thus saving a lot of time when I tape and mud the cut seams.


The plumber thought it was a good idea to replace the steel sink drain pipe. He said that overtime the buildup from "stuff" can decrease the inner diameter of the pipe. Boy, was he right!! He said he had never seen it so bad. We were lucky if we could stick our fingers through the hole. The other problem was that the drain from the sink to the main drain was pitched in the wrong direction - so instead of 1/4" drop for every foot of run towards the drain, it was pitched towards the sink, thus causing an uphill battle for drain.

No wonder our sink had a slow drain before!!

He also said he will replace the steel drain for our bathtub as well.


We used his Cast Iron Cutter to cut the vent stack and drain. That stuff is HEAVY!!! Took 2 of us to carry an 8' piece out the door.


Our nice new bathroom drain and main drain and vent stack. He also added an Air Admittance Valve at the sink for extra venting. The first PVC pipe that you see running vertically connects the toilet and sink upstairs to the main drain. The 2nd pipe is the main vent stack.


The upstairs rough-in pics. The venting for this will be an Air Admittance Valve (AAV).

The IRC requires all structures to have one main vent which runs undiminished in size from the building main drain up and out through the roof. Additional auxillary vents may be terminated through the roof, through the wall, in the attic space or an unlimited number of AAV's.

Of course to tear up the floor so the plumber could run his pipes, I had to remove the wall I had installed for the new door. I also had to remove the finished landing area. Tried taking up the hardwood nicely, but it got destroyed in the process.

Sunday, November 29, 2009

Progress

We have made a lot of progress on the room. But, of course, there is much left to do.

Electrical:
Some of the electrical has been put roughed in. We ran wires to where the lights will go and where the outlets will be. We are waiting till we finish the rest of the framing before we will be able to finish our electrical.

Plumbing:
We have hired a plumber to rough-in for our half bathroom. It will be a very small, but functional bathroom - 3' x 6'. We hope to have the plumber in this week, but being prime heating season, our bathroom is not a high priority of course.

Framing:
We are about 75% done framing in the room. We have framed in the knee walls, part of the built-in bed, the built-in dressers, the new entry door and moved the collar ties. We removed the old entry door and have moved the wall about 18" into the room so we could fit a half bathroom.

Insulation:
90% complete. When we are finished with the framing, we will be using blown-in insulation behind all built-ins and knee walls.


Before picture of the knee wall where the dressers will go.


Before picture of the Knee wall where the built-in bed will go.


After picture of where we moved the bedroom entry door.


Picture of where the bathroom will go. Small doesn't begin to describe it. It will be nice to have an additional bathroom as we only have 1 bathroom in our house.


Interior - After picture of the new window.


After picture of the collar ties. Much more headroom. Makes the room feel a lot more open.


Me framing in the knee walls for the dressers.


We bought the toilet and sink so we could dry run and figure out where exactly we want to place them. This gives us the best idea of how the toilet and sink will be and if they would actually fit.


My father-in-law graciously donated these 2 dressers for us. I had to cut the bottom drawer off the taller dresser to make it fit in the knee wall, but everything fit perfectly. Having the built-in dressers and built-in bed saves 99% of the floor space. See how much floor space they take up by themselves if they weren't in the knee walls.

Monday, October 5, 2009

Please HELP

A few months ago, I entered The One Project Closer Before and After Contest. I won the weekly prize. I wrote about it when I posted my daughter's bedroom update.

Starting today though I’m in the running for a grand prize versus all the other weekly winners from this year’s event.

Could you please visit the page here and vote for the best project? If it turns out to be "Bedroom by Michael #6", that's fine by me and will hopefully push me ahead and win the $150 gift card, which I can use for the current bedroom I am finishing. Would be ironic to win the prize for the bedroom I completed last year and use it on the bedroom I am finishing this year :)

It looks like you can only vote once (doesn’t appear this is a daily voting option) so if you could pass this along to some of our other friends, I’d appreciate it.

And even if I don’t win, you know I’ll be back next year with another project entry.

Sunday, October 4, 2009

Last Room. to be updated.


Enjoy the ugliness. Its the last non-updated room in the house.

Good-bye paneling, 4 layers of wallpaper, small window, fake ceiling tiles, and ugly sub floor.

We don't know the remodel plan exactly yet.. But I figured I would get started on demo, raising the collar ties and replacing the tiny window with a double one.

Here are the before pics. It should as good as Keira's room (my daughter) when complete.

Baby's Room Construction Demolition


Anthony and I finished demo in the baby's room a couple of weeks ago. It's down to the studs.

New Window


Before Pics of the window. I had already removed the window sashes.


Post window installation, pre-vinyl siding completion.

After a long day, we finally finished installing the "new" window. I say "new" because I found this window on Craigslist. It is made by Harvey with Low-E and Argon Gas filled as well as 6-over-6 Grills Between the Glass. It was listed as a 60" x 60" window, but when I got there it was actually a 60" x 65" window. It was too good of a deal to pass-up and I figured I would be able to squeeze it in since we had some extra space buffered in my measurements. Normally this window is $500-$550, but the guy had it "priced to sell" for $50 because he wanted to get rid of it.

It BARELY fit. Since the porch roof is so high, it didn't give me the full ability to move the window as low as I wanted. But, it fit perfectly. I had 1" from the top of the porch roof to the bottom of the window J-Channel. I also couldn't go any higher without cutting into the roof.

Luckily I was able to get a couple of my friends and my dad to help me out. It took about 8 hours start to finish. Which included removing old window, siding around old window, reframing the wall, installing the window and re-installing the siding. It's an east facing window so there is great sunlight on that side of the house in the am. It also is better insulated and much larger than before. Since we have a cape and vaulted ceilings, it is the only window in the entire room.

Should help. I also found a great deal on 3/4" 140 sq. ft of Pre-Finished Beech Flooring on Craigslist not too long ago. This will be the flooring for this room. It is shy by about 30 sq. ft., but I will probably do an inlay to make up the difference. I got the flooring for about $.71/sq. ft.

Big thanks to Anthony, Hippert and my dad.

Tuesday, September 15, 2009

Ok...it has been a couple of weeks since I have last posted. I have been working on a couple of projects, but nothing like the deck. I have replaced one of the worst windows in the house (this post) and finished deconstruction on the upstairs bedroom. I did pick up the hardwood flooring for that bedroom today. We need 170sq.ft and I was able to pickup 140 sq. ft of Prefinished Beech Hardwood off of Craigslist for $100.

The window I replaced is one of the ones in our bedroom and by far the worst window in the house.. not only can you literally see the curtains blowing in the wind ( with the window fully closed of course) but the panes of glass were literally falling out of the window. Of course, I could have reglazed the window panes, but because the window was warped, it would not solve the energy loss problem. Even with a storm window installed.

I replaced it this with some help from Anthony and I think it turned out great!! I decided to use a new construction window for the following reasons:
  1. The rough opening for the framing of the window is about 4" taller and 3" wider than the rough opening dimensions of the current window. This means that I can get a window that is larger in both directions. The old window was 30" wide by 53" tall. The rough opening is 34.25" wide by 57.25" tall.
  2. Home Depot sells Andersen Windows with Rough Opening requirements of 34" x 57.25". PERFECT!! They also have Grids Between the Glass (GBG), Low-E Coating and Argon Gas filled between the panes. They are double hung, vinyl (low maintenance), with tilt-in for cleaning. All for $175! A deal! Of course this means new molding, but since the molding that we like is Rosette's and Fluted, this is not a problem. And the molding costs about $30 for the window (including the new sill).
  3. A new construction window seals better on the outside of the house than a replacement window.
Interior Picture Old Window (after molding removed)


Exterior Picture of Old Window:


During Construction:


Finished Interior Picture! Major improvement.


Finished Exterior Picture. Since the trim on the old window was a lot wider than the trim on the window, there was a gap to fill in. I used pieces of PVC and ripped them down to the correct width. Obviously not as nice as if the siding went into the J-Channel, but still much nicer in comparison.

Sunday, August 2, 2009

Bathroom Complete

So...we got back from vacation and I was able to finish the bathroom. Our downstairs projects are officially complete which means we start deconstruction on the 2nd bedroom upstairs for the little boy coming around October 10th.

The final steps included removing the remaining tile. To do so, I had to disconnect the sink and remove the tank on the toilet. This, of course, made it into a full day project.

Since the bathroom is so small, we have to come up with some creative ways for storage. The house has 1 bathroom and it is 8'x5' (not including the shower).


I added some shelving above the toilet. But, in order to still have access to all of the internal parts of the toilet, I added a piano hinge to the shelf. I then added some front supports to keep it level.


I notched the beadboard for the sink so that it would sit flush against the wall. I had the beadboard come flush against the top of the sink so that I could pull the base of the cabinet away from the wall an inch or so and have the sink be supported by the cabinet.


Overall my wife and I are VERY happy with the outcome. The beadboard is so much nicer than the tile that was there.