Tuesday, December 13, 2011


Here is a panoramic view of the Family Room and the workshop.


Monday, December 12, 2011

Family Room...COMPLETE

A couple of updates (which happen more often when I actually have active projects).

1st Project:
Family Room is done!!  I completed the mudding.  I was going to wet sand, but it was taking 3x as long, so I went back to the tried and true method of messy sanding. 

After that, we hired a painter to spray the popcorn ceiling and prime and paint the walls.  He did a great job!! And he finished far faster than I would have :)


Plastic down before spraying.


Do you remember what we started with?? Let me remind you :)


This is what the room looks like now.   Ignore the mess. 


2nd Project.  Workshop, more organized.  Installed the 3 doors this weekend and the additional peg board.  Finally started unpacking boxes of tools and organizing them.  It is going to fill up pretty quickly.

Here are a couple of pictures of the progress.


Dust collection and air compressor closet.  When we were installing the doors, I needed the air compressor, so I have it run temporarily through the dust collection hole.  Eventually that will be changed to a more permanent solution.

Tuesday, December 6, 2011

It's GONE!!!

We are the champions!!  We finished wallpaper removal this weekend!!!  1 room down, 7 to go.  This is by far the worst room with wallpaper, so we will hold off on doing the rest of the house.


Last night I started the mudding process.  I completed about half and will finish mudding tonight as well as wet sand tonight.
I contemplated just skim coating the entire wall :)


Ignore the fashionable outfit including black socks


I also have finished hanging the cabinets in the workshop and started organizing.  The Wallpaper project has taken over, so I haven't gotten too far with the organization.  Eventually when I have everything set the way I want, I will outline the tools so when my kids borrow them, I will know which ones are gone.


Wednesday, November 30, 2011

Out with the Old

This is what the family room looked like when we bought the house.  It has stayed that way since we moved in May 28th.


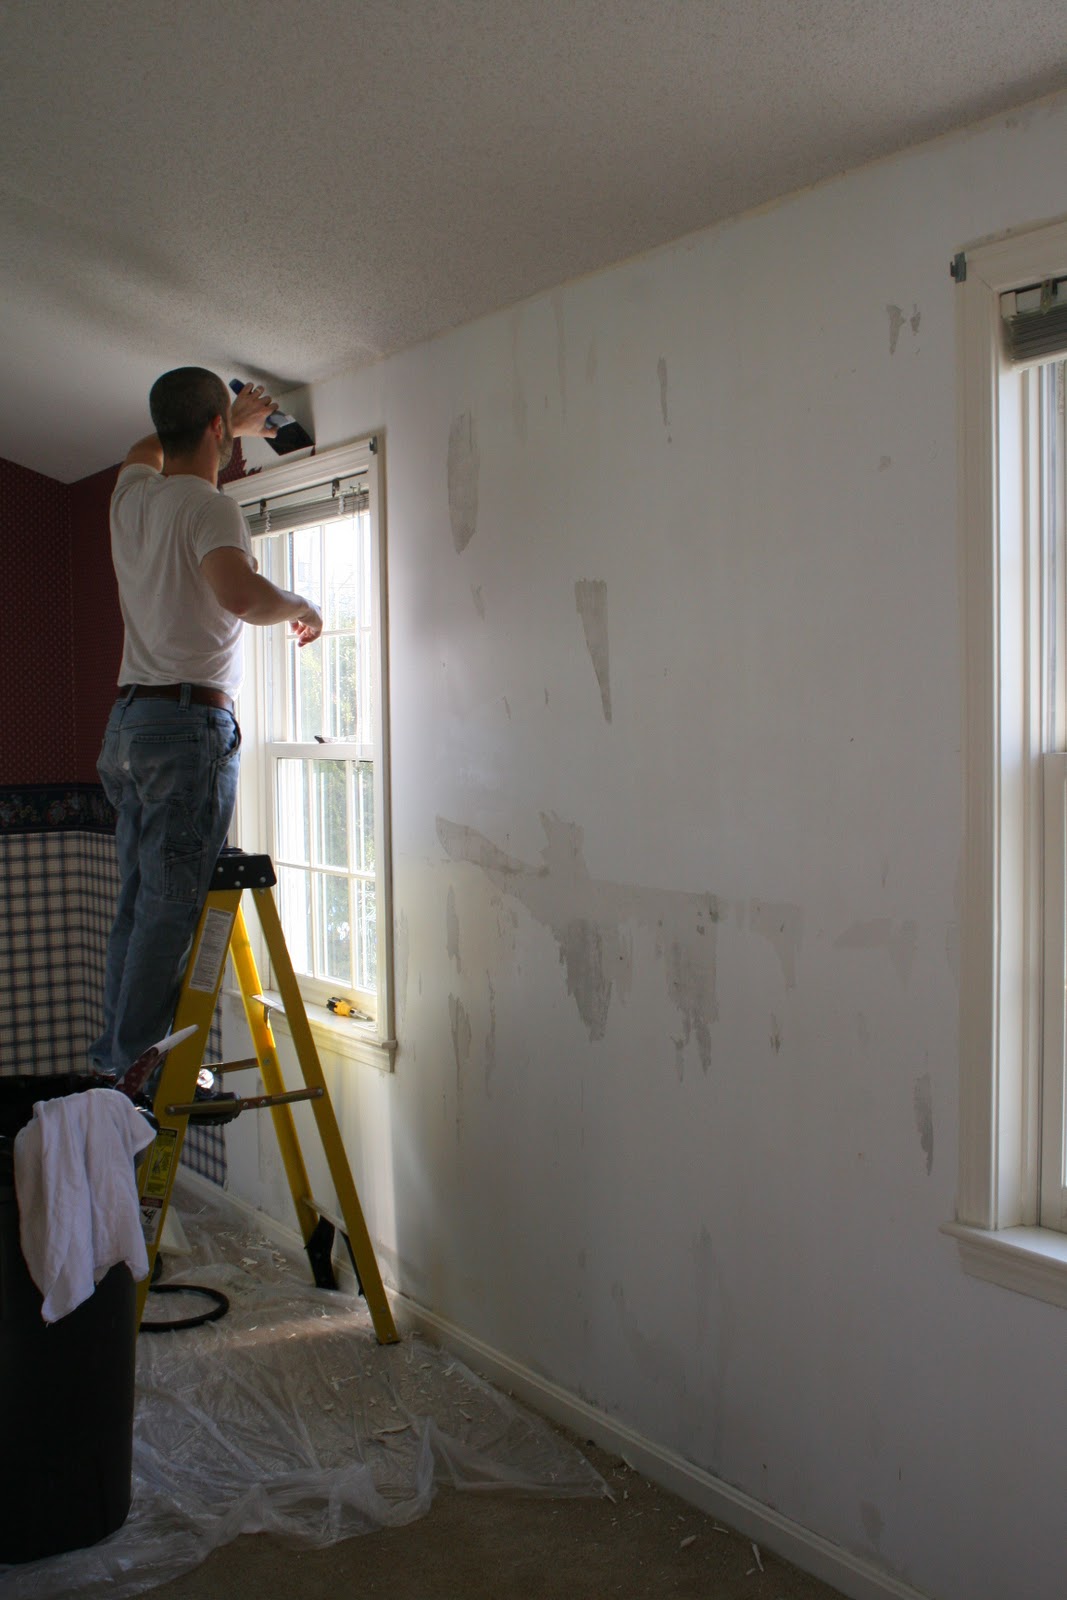
In the last month in between working on my workshop, we have taken to removing the wallpaper slowly. We borrowed a wallpaper steamer from a friend instead of renting it.  Here are some pictures of the process.  Have I mentioned that I hate hate hate wallpaper.  This is the epitomy of overdoing wallpaper.  Why do one pattern, when you can have 3!!  The bottom is a nice plaid pattern.  The top is a dotted flower pattern.  And don't forget the chair rail blue border!!

The sad thing is the parents of my wife and I actually liked the wallpaper!!  Can't account for style :)

The joy of wallpaper steaming.  Get everything wet.  And after you take off the top layer with the print, you have to go back and take off the the rest of the paper.  Hard to see against the white walls.

Also, some of the paint came with it.  Mostly in the areas that weren't primed it seems.  There will be a lot of skim coating with drywall compound in this room.


The hardest thing is that this is the most heavily used room in the house.  This is the kids play room!  We have to move the toys around and the furniture around.  Being such a large room helps though.  We really love this house and the space it has afforded us.


Here is another shot of an area that will need to be mudded.

We will paint the wall a nice greenish/greyish/blue color.  The long-term plan is to put beadboard on the bottom half with a chair rail.  This will protect the wall from children and break up the large expanse of the walls with cathedral ceilings.

I tell you, just what we have removed so far has made the room feel larger and brighter.

We have about half of the wallpaper down so far.

Goodbye 1993

I never think to post the small things we do around the house.  There doesn't seem to be a week that
goes by that we haven't made a change around the house.  Adding shelves, changing knobs, new lights...etc.

So, I actually took a before and during picture of one of our projects.  We changed the knobs in the kitchen.  We don't have the funds to change out the counter tops and flooring, so we went with something less expensive.  At $2 each off eBay, we purchased 41 replacement knobs.

The first picture is the knob that is on there.  The 2nd shows a side-by-side view of the new and the old.

One nice thing that I will not miss was constantly getting a belt loop or pocket or even just my pants caught on the old knob.


Monday, November 28, 2011

Beginning of the End

This long weekend I didn't get too much time to work in the basement.  I spent time with the family instead.  But I did finish putting in the outlets.
Here is the frame that the pegboard will sit on.  I used 1x3 furring strips on the outside and 3/4" dowels in the middle.  That way I would maximize space for pegs.


I installed the pegboard and lower cabinets.  I put space between the cabinets so that I can shove some larger items (boxes) between them.  I will used some MDF or melamine for the bench.

I need to pick up some 3/4" box extenders to bring my outlets flush with the Pegboard.

To hold up the levels, I used some 3" screws that I screwed part-way into the furring strip.  That allows me to hang things where I wouldn't be able to put pegs/hooks.

Wednesday, November 23, 2011

Drywall...Check

I was very happy to complete the drywall stage.  Now onto finishing electrical.  Picked up the cabinets this weekend.  Not 100% sure how I want to set them up yet.