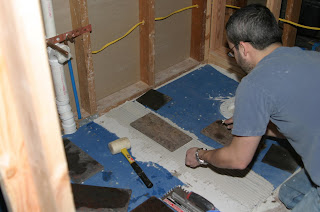
I purchased the items we would need on Thursday (New Years Eve) which consisted of:
- 2x4s for framing in the door and the wall behind the toilet.
- Tile Backer - 1/4" thick because the gap underneath the toilet flange was 1/4" after reinstalling the subfloor and plywood. So, in all I have 1 3/4" of backing before the tile.
- Box of 10 additional tiles
- Thinset for underneath the tiles and tilebacker.
On Saturday we were supposed to go to a birthday party, but since it decided to snow heavily, the party was cancelled. Lucky for me. I was itching to get the tile installed.
Since the bathroom is so small, I didn't want to just install 12x12 tiles in there. It would look ok because it is slate tile, but still kind of odd with such large tiles. I decided to cut the tile in half (6x12) and lay it out subway style (staggering seams).
I tried to use a snap tile cutter, but since slate is composed of layers, it just broke into pieces. So, I used the tile saw and it worked flawlessly.
I found my center line and worked out from there. It took me about 4 hours to cut and lay all 17 tiles used.


I dried fit each row before laying my thinset and worked a row at a time.


I am nowhere near a professional tiler. I can pass as mediocre (In My Opinion). Since Slate is varying thicknesses, the tiles are not all level. I should have buttered the back of the tile as well as the floor on the thinner tiles. I didn't and so I will have to use the grout as a sort of bevel between the tiles as some of the tiles sit about 1/16" higher than others. I had just enough thinset (literally) to lay the tiles, so I would have run out if I had buttered the back of the low tiles.
Not an excuse by any means, but makes me feel better :0
We picked Mocha for the grout color which is a dark greyish brown color. We will be using SpectraLock Stain Resistant Grout by Laticrete. This is the same grout we used on the downstairs tiles and has held up great.
I like it because it is an epoxy grout. It is a 2-part mixture that you add the color to. It never needs sealing and resists stain. Of course it is more expensive than sanded grout, but I like the fact that it is a true epoxy solution.
More information here:
http://www.laticrete.com/homeowners/products/grouts/stain_resistant.aspx
Since I have done 250 sq.ft before, this will be far easier. You have to make sure you remove all excess off the tiles because once it dries, it is there permanently; especially on a porous surface like Slate. In the kit you buy, they include a 2 cleaning packets that you add to your cleaning buckets. I usually have 3 buckets...1st pass (dirtiest)...2nd pass (1st packet)...3rd pass (2nd packet).
No comments:
Post a Comment